|
|
 Also see: John's
Photo Galleries | Client
feedback specific to John |
About Us Also see: John's
Photo Galleries | Client
feedback specific to John |
About Us |
| |
|
In sharing a selection of useful photography tips
I feel that it's important to pass on in as practical a manner as
possible what was of most benefit to me in my early photographic days.
My list follows, but first to my own photography story . . .
It began with black and white film around a seaside
pier in Rhyl, north Wales when I a young boy . . . my Father shared that
he was impressed with my efforts, and his encouragement was to be the
foundation of a photography career. Fast forward to adulthood and the
joining of a local photography group - Deudraeth Camera Club in
Penrhyndeudraeth in Wales - which turned out to be a very good decision despite my initial reluctance.
The result was that I was literally catapulted into various photographic careers
that led to what I'm doing today. But it wasn't just that . . .
I also asked lots of questions and analyzed the images that were presented by all of the members. Never with the attitude of 'I'll never be that good', but one of, 'I would like to take pictures just as good'!
To improve our picture taking we ought to analyze what makes a picture successful. Is it the lighting? The composition? The viewpoint? The depth of field? The camera angle? Or is it because the picture is different from the 'ordinary', and makes the viewer look again and again? Think along any or all of these lines, and you're heading down the right road.
In my case there was also an additional ingredient . . . I was 'thirsty'! By this I mean that I had a desire to learn and improve, and to take the bad with the good. The end result in my case is Travel Images Photography Tours, but you may find your own 'photography happiness' in another realm. May it be so!
Thank you for the privilege of your time.
John
|
|
|
|
|
|
Vision
 Develop the art of 'seeing' images,
and whenever possible, produce images that fall into the 'out of the ordinary'
category. Awareness, anticipation and imagination are a few of the 'personal tools' needed to
merge successfully with our photographic equipment and
settings. For example, you're on a hillside looking down on a winding road. What you visualize is a red vehicle
on an 'S' curve on the road. Now all that is needed are some
appropriate camera settings, and some patience . . . then voila! Develop the art of 'seeing' images,
and whenever possible, produce images that fall into the 'out of the ordinary'
category. Awareness, anticipation and imagination are a few of the 'personal tools' needed to
merge successfully with our photographic equipment and
settings. For example, you're on a hillside looking down on a winding road. What you visualize is a red vehicle
on an 'S' curve on the road. Now all that is needed are some
appropriate camera settings, and some patience . . . then voila!
|
| |
|
Light
Utilize the best light of the day.
Light, shade and texture enhance any image, be it a close-up or landscape.
Sometimes, just by changing our camera angle we can improve the
angle of light falling on any given subject. Get yourself to your chosen spot early or late, and then hurry up and wait!
|
| |
|
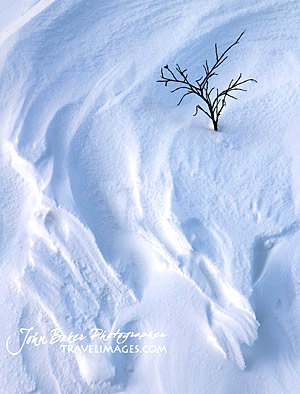
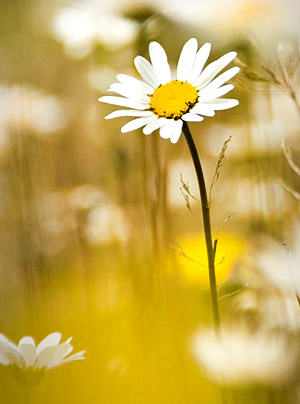
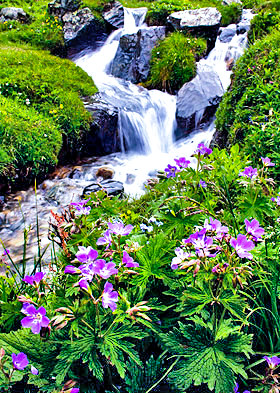
Simplicity
'Clutter' is fine and necessary with some subjects such landscapes with foreground interest, but as a general rule keep things simple. Also, keep an eye out for distractions in the background
or on the edge of the frame, such as a branch, or a patch of unwanted light.
If foreground interest is not your thing, then perhaps
'minimalist' is?
Example 1
Example 2
Example 3
|
| |
|
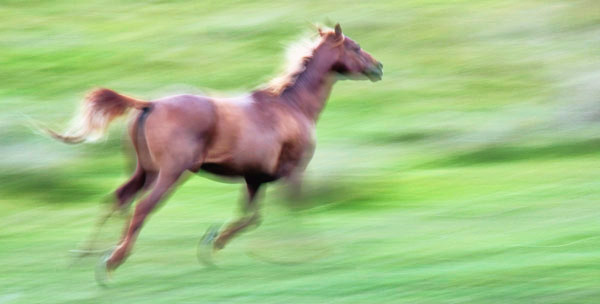
Creativity
Experiment with techniques . . . could this subject be recorded best with a slower shutter speed; by selective focus; or a ‘ton’ of
depth of field and so on? Make the ordinary look extraordinary.
Example
1
Example 2
Example 3
|
| |
|
Composition
Can the
composition be improved with a different camera angle, or tighter framing?
Try zooming in and out, and/or walk around and consider the angle of light on your subject.
Look for would-be distractions in your field of view, then go ahead and shoot in the knowledge that you are giving the subject 'your best shot'.
|
| |
|
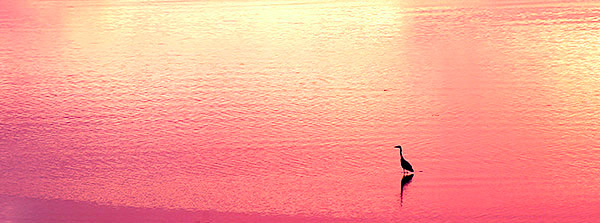
Impact
Fill the frame whenever possible. Try a different camera angle, especially closer, lower or higher.
Use the widest angle lens you have, then get in close to
your subject. Experiment with panning techniques. Try different
fill-flash/daylight exposure combinations,
and remember that
silhouettes by their very nature have a lot of impact.
Example
1
Example 2
|
| |
|
Quality
There are many situations whereby hand-holding your camera
yields sharp results, but there are those times such as in
low light - I call it 'available darkness'! - that call for
some camera stability. That slightly soft image that you
thought could be your best shot could have made the most of
a tripod, right? A tripod and a low ISO will yield your best
quality whenever practical. Long lenses are often in need of
support, so how about a monopod? Of course it may be
impractical to use a camera support for the long lens/action
shot combination so opt for a fast shutter speed, say 500th
of a second and faster, combined with a wide aperture of
around f4, and a high ISO.
|
| |
|
Details, details
Explore your viewfinder and remove those elements that will bother the life out of you later! This will usually be something akin to a splash of sunlight on a rock, or misplaced blade of grass when doing a macro [close-up] shot.
|
| |
|
Guidelines
Follow those photo guidelines such as the ‘rule of thirds’ and so on,
but, also break those ‘rules’ whenever you see fit. Rule 1, take note of the rules, and rule 2, break the rules!
|
| |
|
Be prepared
Keep your camera on hand in anticipation of those special moments. Make sure your memory card isn't almost full, and pre-set
your camera to capture what will likely be an 'action '
situation. A setting of 250th @ f.8, or Program [P] will
place you in the ballpark, plus
it will be beneficial if you enable the 'high speed
continuous' frame shooting setting.
Example 1
|
| |
|
Keep an open mind
Quality images
are to be found with the sun at it’s highest point of the day
- changeable weather could be a favorable factor too - and polarization
does work at other than right-angles to the sun. In other words you don't have to
follow along with the common clichés. |
| |
|
Be thorough
Don’t settle for ‘second-best’,
and the subsequent disappointment it often brings. Consider all the elements that could improve your picture before you
press the shutter button. There might be something distracting in the picture such as rubbish/trash,
or a branch that could be removed in a matter of moments. Also, does the subject merge with something in the background that can be cured simply by moving to the right or left?
|
| |
|
Planning and patience
Get to know your subject's behavior patterns be it
Elk during the rut, a bird approaching a nest, or when the
sun will hit a mountain peak at dawn. When you get your
logistics right,
it's just so very rewarding and satisfying. |
| |
|
The best tools for the situation
To improve your pictures consider your lens and accessory
choices. Will a filter help? Will a longer lens be useful for landscapes? Will
manual focusing alleviate your focusing problems? Would an
interval timer simplify night or time lapse photography? These are decisions
and techniques you must make for yourself, so practice them
often until they become second nature to you.
Example 1 . . . shot while I was asleep using an
interval timer!
|
| |
|
Does the camera make you a better photographer?
Not at all in my opinion. It's really all
down to how you see and compose pictures. Seriously, it's not the
equipment, it's you! |
| |
|
Be adaptable
Change camera positions to leave out those power poles or 'stray' people. Perhaps the shade of a tree can serve as your lens shade? Have you lost or broken your cable release/remote? . . . use the
camera's self-timer.
|
| |
|
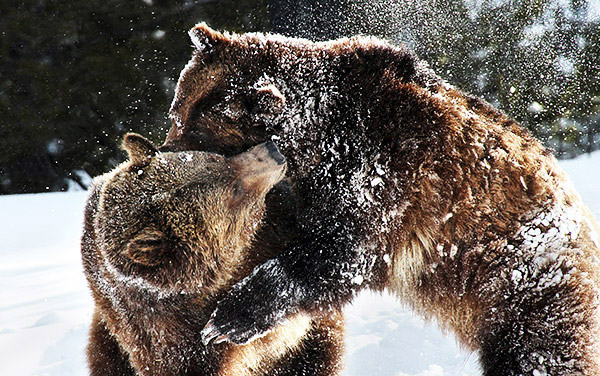
Tell a story
Include the 'environment'. What does the image say about the time, place or person? I personally like to fill the frame with my subject, but once in a while I will include more of the background, such as
for character shots to create an 'environmental portrait'.
This applies to wildlife too.
Example 1
|
| |
|
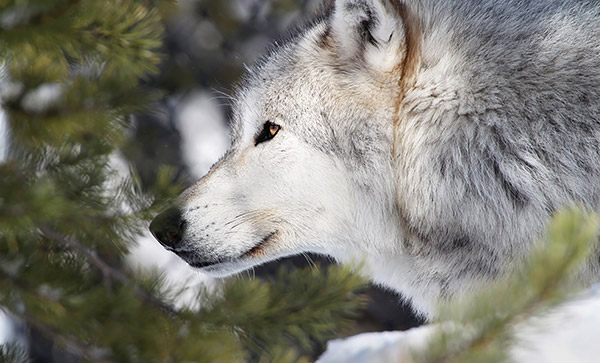
Take advantage of each opportunity
Take the opportunities afforded by zoos, wildlife farms, and events such as historic re-creations to capture those rare and otherwise unobtainable images. Obviously you'll want to get in tight on your subject, so use longer lenses to eliminate
man-made distractions.
Example 1
Example 2
|
| |
|
Make an extra effort
An image you have in mind may require some elaborate setting up. If the image is worth the effort, then go ahead and manipulate and coerce! Also, don't leave that tripod in the car or think, "The
best lens for this shot is back in my camera bag, but . . . ". When you take the time
and effort to get it right you won't be disappointed.
|
| |
|
Make it about you
Take pictures for your own pleasure first of all. Please don’t do
take pictures just to please others or a club judge. Be you,
and pleasing others with your images will certainly follow.
|
| |
|
Photography is an art
Just as with the many other
fields of art out there in the big world, you will naturally develop your own style. Yes, even with a camera. I've been in Camera Clubs and at exhibitions and hear comments such as "That's a 'Joe Bloggs shot", and
yes, we all have that potential within us. Grasp it, nurture
it, enjoy it!

|
|
|
|
Written and photographed by John Baker, Photographer/Guide, Travel Images Photography Tours
All images and text are strictly copyrighted by John Baker Photographer LLC/Travel Images Photography Tours, 1988 - 2026.
Permission in writing must be sought for any form of reproduction.
|
| |
|
Do you have questions or comments about 'Photo How-To'?
To share your thoughts or suggest a photography subject you'd like to see addressed, please Email me.
You're also welcome to submit images for critique, which run the risk of being used as a Photo How-To topic!
|
| |
|
Return to the Photo How-To Index |
| |
|
Also see:
John's
Photo Galleries | Client
feedback specific to John |
About Us
|

